How to Record a Video on your Mac.
Apple
Modern computers contain a lot of different functions about the existence of which we do not even suspect. One of such functions is to record a video on your Mac. Each and every of us has ever had a need either to record a video or audio or screen contents. It could be a video or audio message which you would like to record for your friend and send it privately or share it on your social media page, it could be a self presentation which you would like to record and send to your employer together with your resume when applying for the job in order to introduce yourself better, it could also be screen recording where you would share new features of application you developed with your colleagues. There are a lot of different and interesting ways to use this function.
So how can you record a video on your Mac?
You can record a video on your Mac with the help of camera built into your MacBook. For that you can use the standard program – QuickTime Player.
QuickTime Player Player allows us to record a video from a camera as well as it can be used to record audio from a microphone and save the contents of your Mac screen.
This program supports video recording with a built-in camera and large number of external cameras. To record a video on your Mac you should follow these steps:
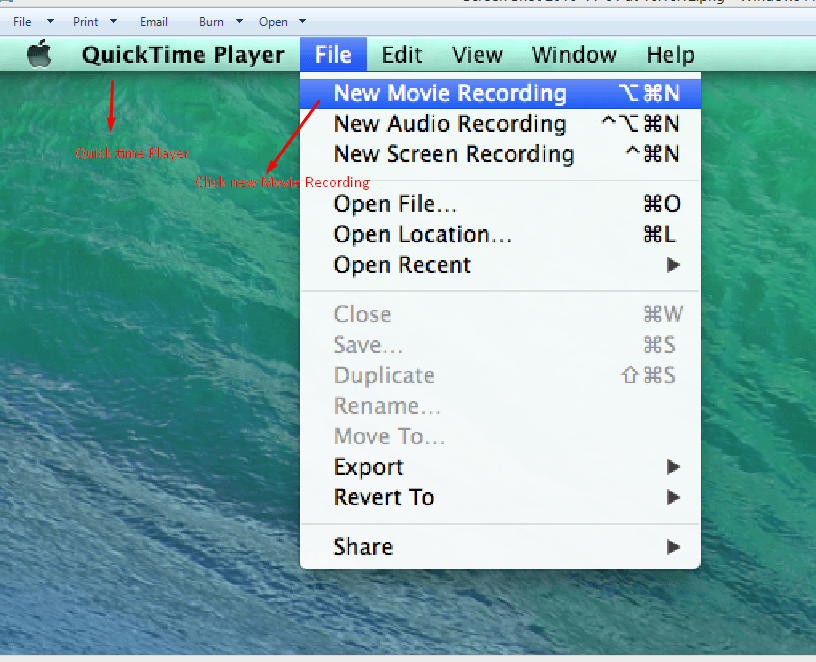
Step 01. Choose File in the upper left corner of your screen.
Step 02. Choose New Movie Recording or press ⌥ + ⌘ + N on your keyboard.

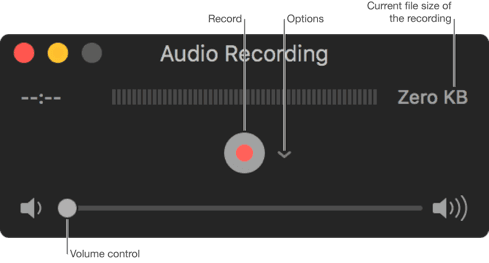
Step 03. In order to start new recording click Record button, to stop recording click it one more time.
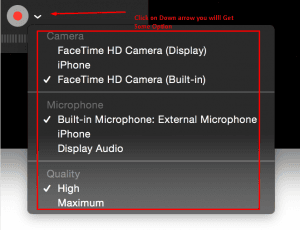
You can also change option for good Quality Video and audio .

Step 04. If you want to save the video, choose File again and press Save or ⌘ + S on your keyboard.
Or you Can click on Stop Button the Video will be Automatically in your Movie Folder.
See Image

So now you know how to record a video on your Mac and it maybe useful to learn
how to record an audio.
It can be done with the help of built in-microphone or external microphone.
Here it is what you should do:
Step 01. Choose File in upper left corner of your screen.
Step 02. Choose New Audio Recording or press ^⌥ + ⌘ + N on your keyboard.

Step 03. In order to start new recording click Record button, to stop recording click it one more time.
If you want to save the audio, choose File again and press Save or ⌘ + S on your keyboard.
How to Record Screen on your Mac.
There is one more useful option which you may need – record your screen. You may either record the whole screen or just some part of it. To record your screen follow the instructions:
Step-01. Choose File in upper left corner of your screen.
Step-02. Choose New Screen Recording or press ^ + ⌘ + N on your keyboard.

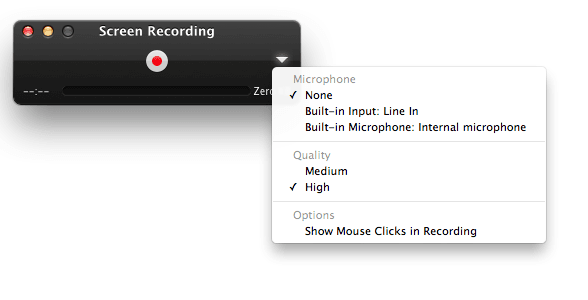
In order to start new recording click Record button. If you want to make recording of entire screen then just click anywhere on the screen. If you wanna record just some particular part of the screen then drag the cursor to that area and click Start Recording button.
Step-03. To stop recording click Stop button or press ⌘ + Kntrl +Esc on your keyboard.
Step-04. If you want to save the screen recording, choose File again and press Save or ⌘ + S on your keyboard.
For all three kinds of recording there is an option to change the recording settings. To do that you need to click the arrow next to the Record button. You can also monitor the audio by using volume slider.
Hope this information was useful to you and you learnt not only how to record a video on your Mac but also how to record an audio and how to record your screen.


I am not sure where you’re getting your info, but good topic.
I needs to spend some time learning more or understanding more.
Thanks for magnificent information I was looking
for this info for my mission.
Thanks order viagra